Why Your Washing Habits Matter More Than Your Soap
When a car’s finish begins to look dull or scratched, many owners assume the culprit is the environment—sun, rain, or airborne fallout. While those elements play a role, the truth is that the majority of visible swirl marks and fine scratches are self-inflicted. The wash mitt, the bucket, and the drying towel are where most damage actually happens. Understanding that simple fact changes how you approach every rinse and wipe.
The primary enemy is grit. Loose sand, road film, and microscopic debris cling to a painted surface. When you run a wet sponge over that layer, you are essentially dragging fine abrasive particles across the clear coat. The friction does the rest. A single careless pass with a dirty mitt can leave behind more damage than months of outdoor parking.
To minimize risk, build your routine around a few basic principles:
- Pre-rinse thoroughly. Use a strong stream of water to flush loose dirt away before any mitt touches the panel. This step is not optional; it is the foundation of safe washing.
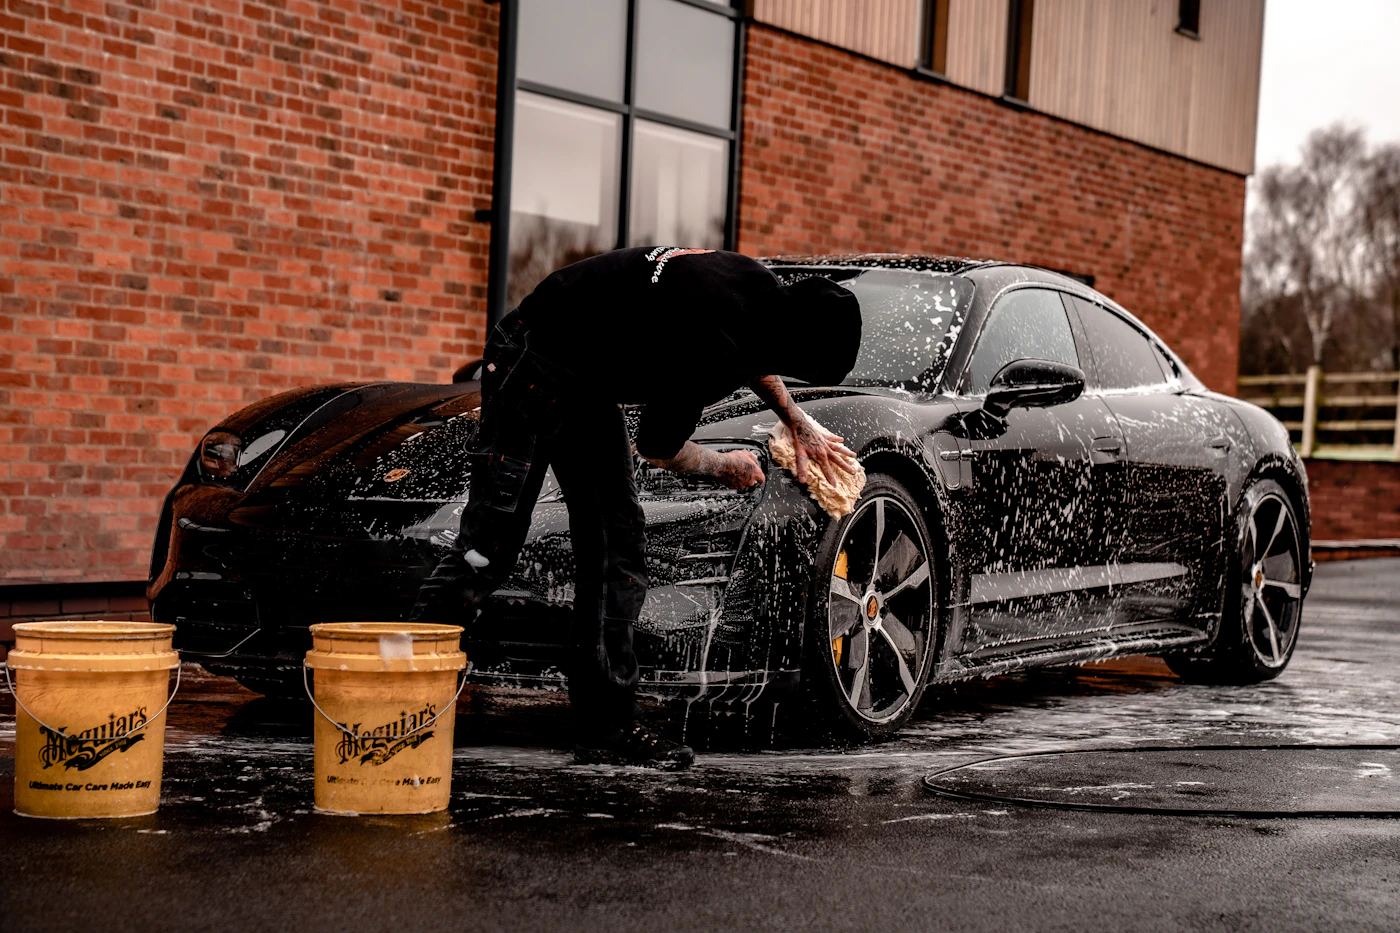
- Use the two-bucket method. Keep one bucket for clean soapy water and a second with plain water to rinse the mitt after each pass. This keeps grit out of your wash solution.
- Work from top to bottom. Lower panels accumulate more grime, so wash them last with a separate, dirtier mitt if possible.
- Let lubricants do the work. Use plenty of soapy water and keep the surface wet. Never scrub; glide the mitt gently with light pressure.
Drying is just as critical. Pat the surface with a clean, soft microfiber towel rather than dragging it across the paint. If you suspect heavy contamination, such as tar or baked-on bugs, address those spots with a dedicated pre-soak before washing. For anything beyond routine care—such as removing embedded rail dust or dealing with oxidation—consult a professional detailer who has the proper tools and training. Your careful habits will always matter more than any chemical in the bottle.
Gathering the Right Supplies Without Overthinking It
The truth is, you do not need a wall of expensive products to wash a car safely. A short list of basic tools will get the job done well, and most of these items will last for years if you take care of them.
The Essentials
- Two buckets: This is your first line of defense against scratches. One bucket holds your soapy water; the other holds plain water for rinsing your mitt. By dipping the dirty mitt in the rinse bucket before reloading it with soap, you keep dirt and grit from being dragged back across the paint.
- Grit guards: These cheap plastic grids sit at the bottom of each bucket. They trap the heavy dirt that falls off your mitt, keeping it below the waterline and away from your wash water.
- pH-neutral car shampoo: Use a product made specifically for automotive paint. These formulas are gentle and designed to lift dirt without stripping wax or sealant.
- Microfiber wash mitts: A plush microfiber mitt holds soap and water while trapping dirt in its fibers. Avoid sponges, which can grind grit into the surface.
- Drying towels: A large, waffle-weave microfiber drying towel absorbs water quickly without heavy pressure. Pat or drag it across the surface rather than rubbing.
- Hose with an adjustable nozzle: You need a steady, gentle stream for the initial rinse and final rinse. A nozzle that produces a wide fan pattern is more forgiving than a narrow jet.
A Note on Dish Soap
Skip the household dish soap. It is formulated to strip grease and food oils, which also means it will strip the protective wax or sealant from your paint. Over time, this leaves the clear coat more exposed to environmental contaminants. Car shampoo is not expensive, and using the right product is the simplest way to avoid long-term dullness.
Optional Extras A wheel brush (dedicated to wheels only), a separate mitt for lower panels, and a bucket grit guard for the rinse bucket are all helpful, but not essential for a first wash.
The Pre-Rinse: Your First Line of Defense
Most paint damage doesn’t happen during the wash itself—it happens the moment you touch a dirty surface. Dragging a wet sponge or mitt across embedded grit acts like fine sandpaper, scratching the clear coat. That’s why the pre-rinse is non-negotiable. Your goal here is simple: remove as much loose dirt, dust, and road grime as possible before any physical contact.
A pressure washer is ideal for this step, but a standard garden hose with a spray nozzle works fine for most situations. The key is to work from the top of the vehicle down, letting gravity pull the loosened debris away. Don’t be tempted to blast one spot for a long time—you’re chasing dirt, not etching clean.
Spend extra time on the areas that collect the most grit:
- Wheel wells: These trap mud, sand, and brake dust. Spray from behind the wheel, aiming outward, to avoid pushing grime deeper into the suspension parts.
- Undercarriage: A quick pass along the lower frame and rocker panels clears the salt and silt that accelerates corrosion. Keep the stream at a shallow angle so you’re not forcing water into wiring or seal gaps.
- Lower doors and bumpers: These zones get the brunt of road spray, so give them a second rinse before you move on.
Here’s the one caution that matters most: keep the nozzle away from paint edges, panel gaps, and trim seams. High-pressure water can lift the edges of factory and aftermarket paint, causing peeling that’s expensive to repair. If you’re using a pressure washer, widen the fan pattern toward the vehicle’s edges rather than using a concentrated stream.
Once the water runs clear off the surface and you no longer see obvious dirt streaks, you’re ready for the next step. It’s not about perfection—just getting the loose stuff out of the way so the wash mitt glides, not grinds.
The Two-Bucket Wash Method: Step by Step
The two-bucket method exists for one simple reason: to keep the dirt you just removed from going back onto the paint. One bucket holds your soapy wash solution. The other holds plain water for rinsing your mitt. That rinse bucket is where the grit settles out, so it never gets dragged across the panel again.
Start by filling both buckets with water. Add the correct amount of car wash soap to the first one only, following the dilution on the bottle. Do not use dish soap; it strips wax and can dull clear coat over time. Park in the shade, or wash early or late in the day. Direct sun dries soap and water into spots before you can rinse them, and hot panels make some products harder to work with.
Work from the top of the car downward. The roof and upper panels are usually the least contaminated, so you want the cleanest mitt and solution on them first. Lower doors, rocker panels, and bumpers carry the most road film and grit, so they come last. For each panel:
- Dip the mitt in the soap bucket, let it load with suds, and wash the section in straight, overlapping lines. Do not use circular motions—they can leave fine swirl marks.
- After one panel (not the whole car), dip the mitt into the rinse bucket and agitate it firmly. You should see dirt cloud the water.
- Return the rinsed mitt to the soap bucket, reload it, and move to the next panel.
When the rinse water looks noticeably brown or gritty, dump it, refill, and start fresh. wash a smaller car or a larger SUV, the same sequence applies. The goal is patience: a few extra minutes of bucket maintenance now saves compounding scratches out later.
Drying Without Leaving Marks
Drying is just as critical as washing. If you stop washing and walk away, the water left on the paint will evaporate on its own. The minerals and contaminants in that water stay behind as spots, and on darker paints, they can be surprisingly visible. The goal is to remove the water before it has a chance to dry, which means working in sections and moving with purpose.
For the actual drying, a clean, soft microfiber drying towel is the best everyday choice. It absorbs a large amount of water and is gentle on the paint. A synthetic chamois also works well and is easy to wring out. What matters more than the tool is its condition—if it is dirty, has picked up grit, or was dropped on the ground, it can drag debris across the finish. Keep it clean and dedicated to this job.
The technique is more important than the towel. Do not rub or drag the towel across the paint in a back-and-forth motion. Instead, lay the towel flat on the wet panel and let it sit for a moment. Then, pull it toward you. This pat-and-dry action lifts the water rather than smearing it. For larger panels, work from top to bottom and use a fresh, dry section of the towel as it becomes wet.
Move quickly, especially in warm or windy conditions. Water spots form faster than you might expect. If you are working on one panel, the adjacent one may already be drying. If you cannot finish the car promptly, air drying is a last resort, not a primary method. It likely leaves mineral deposits and defeats much of the effort you put into the wash.
When to Skip the DIY and See a Professional
No matter how careful you are, some situations are simply outside the scope of a home wash. Recognizing your limits is just as important as knowing how to hold a hose. If you find yourself facing any of the following, it’s time to put down the bucket and call a professional detailer.
- Heavy contamination. Tree sap, overspray from paint or construction, or stubborn industrial fallout will not come off with soap and water. Attempting to scrub these off with a mitt risks dragging abrasive particles across your clear coat. A pro has specialized solvents and clays to remove these safely.
- Deep scratches and oxidation. If your paint feels rough or looks dull and chalky, or if you see scratches that catch your fingernail, hand washing won’t fix it. These issues require machine polishing to level the clear coat. Doing this with a consumer-grade polisher without proper training can burn through the paint, causing permanent damage.
- You lack a safe space. Washing your car on a dusty gravel driveway, under a tree dripping sap, or in direct, hot sunlight is a recipe for new swirl marks and water spots. If you don’t have a shaded, clean area, a professional shop’s controlled environment is a better option for your paint’s health.
Professional detailers have the high-end equipment, commercial-grade chemicals, and, most importantly, the experience to handle these jobs. They know how to correct paint without cutting through it.
That said, professional help is not an excuse to skip maintenance. A regular, basic wash—using the two-bucket method and clean microfiber towels—is still your best defense against everyday dirt and grime building up. Think of the professional visit as the cure for a major problem, and your regular wash as the prevention that helps you avoid needing one.